Upload

Upload any .STL file.
Modify

Modify your selections to best fit the shape of your file.
Download
Download your .PDF to print.
Using any 3D modeling software or 3D print gallery site, create or select your desired model. Export your chosen part as a STL file type. Then upload your STL to PrinterForm.
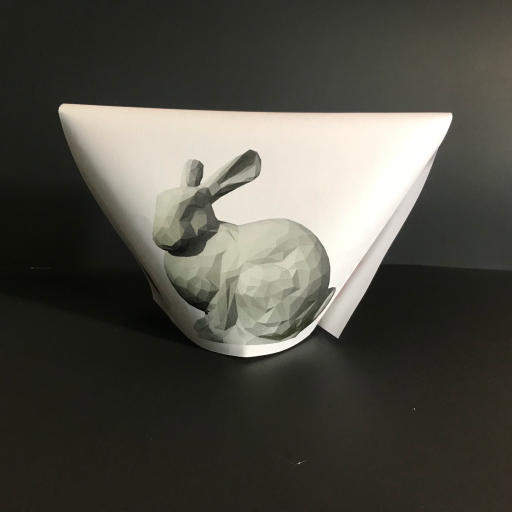
Once you've uploaded your file, select the layout that best fits your object. After selecting the layout you can modify your selection using the drop down tools and sliders located on the right of your file preview.
After finalizing your selections and file layout, confirm after viewing your print preview and select download as a PDF file type. Save your file in an accessible place to use for printing.
Using a standard inkjet or laser printer and 8.5” x 11” paper, print your saved PDF. Once you've printed out your PDF, use the dots and lines shown as instructions for how to fold the sheet into your 3D object. (Note that the locations of the lines and dots will change based on the size and shape of your file as well as the layout type you selected.)
Upload any .STL file.
Modify your selections to best fit the shape of your file.
Download your .PDF to print.